Installation & Setup
Learn how to install and set up the LLMify Craft CMS plugin.
Requirements
- Craft CMS 5.0.0 or later
- PHP 8.2 or later
AI-Assisted Setup
If you use Claude Code or other AI tools, LLMify ships with a built-in setup skill. To use it paste this markdown into .claude/skills/install-llmify/SKILL.md.
---
name: install-llmify
description: Install and configure the LLMify Craft CMS plugin step by step
---

# Install and Configure LLMify for Craft CMS

This guide tells an AI agent how to install and set up the LLMify plugin in a Craft CMS 5 project.

## Step 1: Install the Plugin

Run the following commands in the Craft project root:

```bash
composer require samuelreichor/craft-llmify
php craft plugin/install llmify
```

If the project uses DDEV:

```bash
ddev composer require samuelreichor/craft-llmify
ddev craft plugin/install llmify
```

## Step 2: Enable Sections

1. In the Craft control panel, go to **LLMify → Content**.
2. Enable each section that should produce markdown output using the **Enable for Section** toggle.
3. Set an **LLM Title** and **LLM Description** for each enabled section — these populate the `llms.txt` file.

## Step 3: Add Template Tags

Wrap the content you want converted to markdown with the `{% llmify %}` tag in your Twig templates:

```twig
{% llmify %}
  <h1>{{ entry.title }}</h1>
  <div>{{ entry.bodyContent }}</div>
{% endllmify %}
```

Multiple `{% llmify %}` blocks per template are supported — their content is merged into a single markdown file.

To exclude specific parts within an llmify block:

```twig
{% llmify %}
  <h1>{{ entry.title }}</h1>
  {% excludellmify %}
    <nav>...</nav>
  {% endexcludellmify %}
  <div>{{ entry.bodyContent }}</div>
{% endllmify %}
```

You can also exclude content by adding the `exclude-llmify` CSS class to any HTML element. This class name is configurable via the config file.

## Step 4: Generate Markdown

Generate markdown for all enabled entries using one of these methods:

- **Control Panel**: Go to **Utilities → LLMify** and trigger generation.
- **Entry Sidebar**: Generate markdown for a single entry from its edit page.
- **Console Command**:
  ```bash
  php craft llmify/markdown/generate
  ```

To clear all generated markdown and start fresh:

```bash
php craft llmify/markdown/clear
```

## Step 5: Check the Dashboard

Go to **LLMify → Dashboard** to see an overview of your setup:

- **Site setup score** — shows how complete your site-level configuration is (LLM title, description, note, front matter fields).
- **Section statistics** — content-level stats per section showing how many entries have markdown generated.

## Step 6: Verify the Output

After generating markdown, verify these URLs are accessible:

- `/llms.txt` — Summary file listing all enabled entries
- `/llms-full.txt` — Full content of all entries
- `/.well-known/llms.txt` — RFC 8615 compliant discovery endpoint
- `/raw/{entry-uri}.md` — Individual markdown page (if `markdownUrlPrefix` is set)

Test auto-serve markdown with:

```bash
curl -H "Accept: text/markdown" https://your-site.com/your-entry-url
```

## Full Documentation

For detailed configuration options and advanced usage, see the [LLMify documentation](https://samuelreichor.at/libraries/craft-llmify).
Then just run /install-llmify in your Craft project directory and the assistant will do the development setup for you. You just need to adjust the content settings for your needs.
Craft Plugin Store
To install LLMify, go to the Plugin Store in your Craft control panel, search for "LLMify," and click the Install button.
Composer
ddev composer require samuelreichor/craft-llmify &&
ddev craft plugin/install llmify
composer require samuelreichor/craft-llmify &&
php craft plugin/install llmify
Setup
Enable Sections
In the Craft control panel, go to LLMify > Content and enable each section that should produce Markdown output using the Enable for Section toggle.
Set an LLM Title and LLM Description for each enabled section, these populate the llms.txt file.
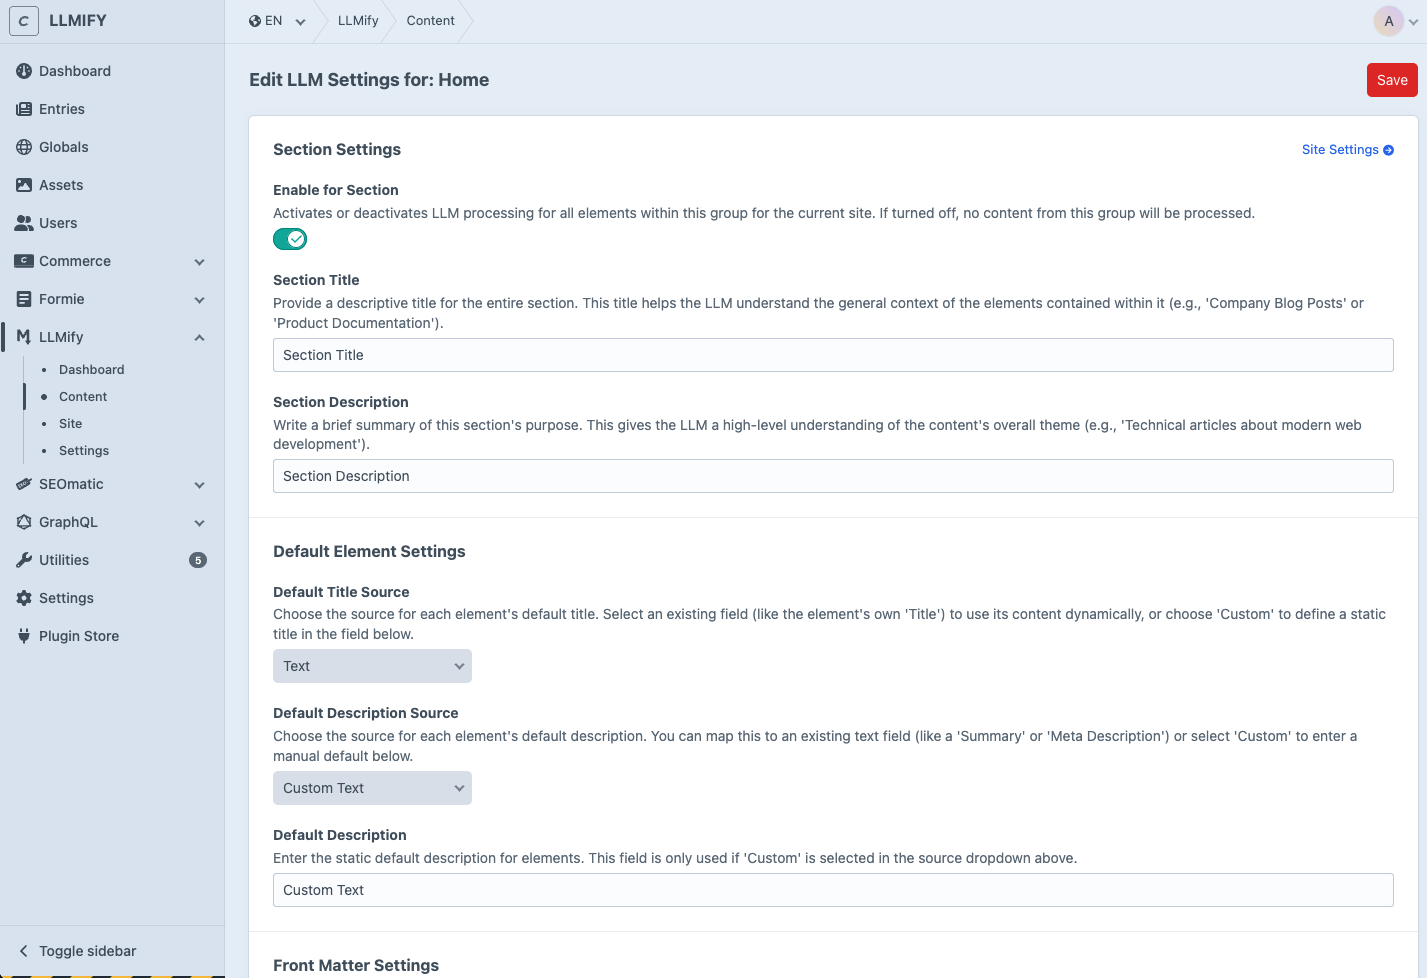
Learn more about Content Settings in the Basic Overview.
Add Template Tags
Wrap the content you want converted to Markdown with the {% llmify %} tag in your Twig templates:
{% llmify %}
  <h1>{{ entry.title }}</h1>
  <div>{{ entry.bodyContent }}</div>
{% endllmify %}
Multiple {% llmify %} blocks per template are supported, their content is merged into a single Markdown file.
Learn more about template tags and other content control options on the Content Control page.
Generate Markdown
Generate Markdown for all enabled entries using one of these methods:
- Control Panel: Go to Utilities > LLMify and trigger generation.
- Entry Sidebar: Use the Update button to generate Markdown for a single entry.
- Console Command:
php craft llmify/markdown/generate
Verify the Output
After generating, these URLs should be accessible on your site:
/llms.txtand/.well-known/llms.txt: list of all URLs with descriptions/llms-full.txt: full Markdown content of all entries/raw/{your-uri}.md: Markdown for a single entry
You can also test auto-serve and bot detection:
curl -H "Accept: text/markdown" https://your-site.com/your-entry-url
curl -A "GPTBot/1.0" https://your-site.com/your-entry-url
Add AI Bot Analytics (Optional)
Want to see which AI crawlers actually hit your Markdown, how often, and which pages they read? Install Craft Insights alongside LLMify and a dedicated dashboard appears in the Insights subnav.
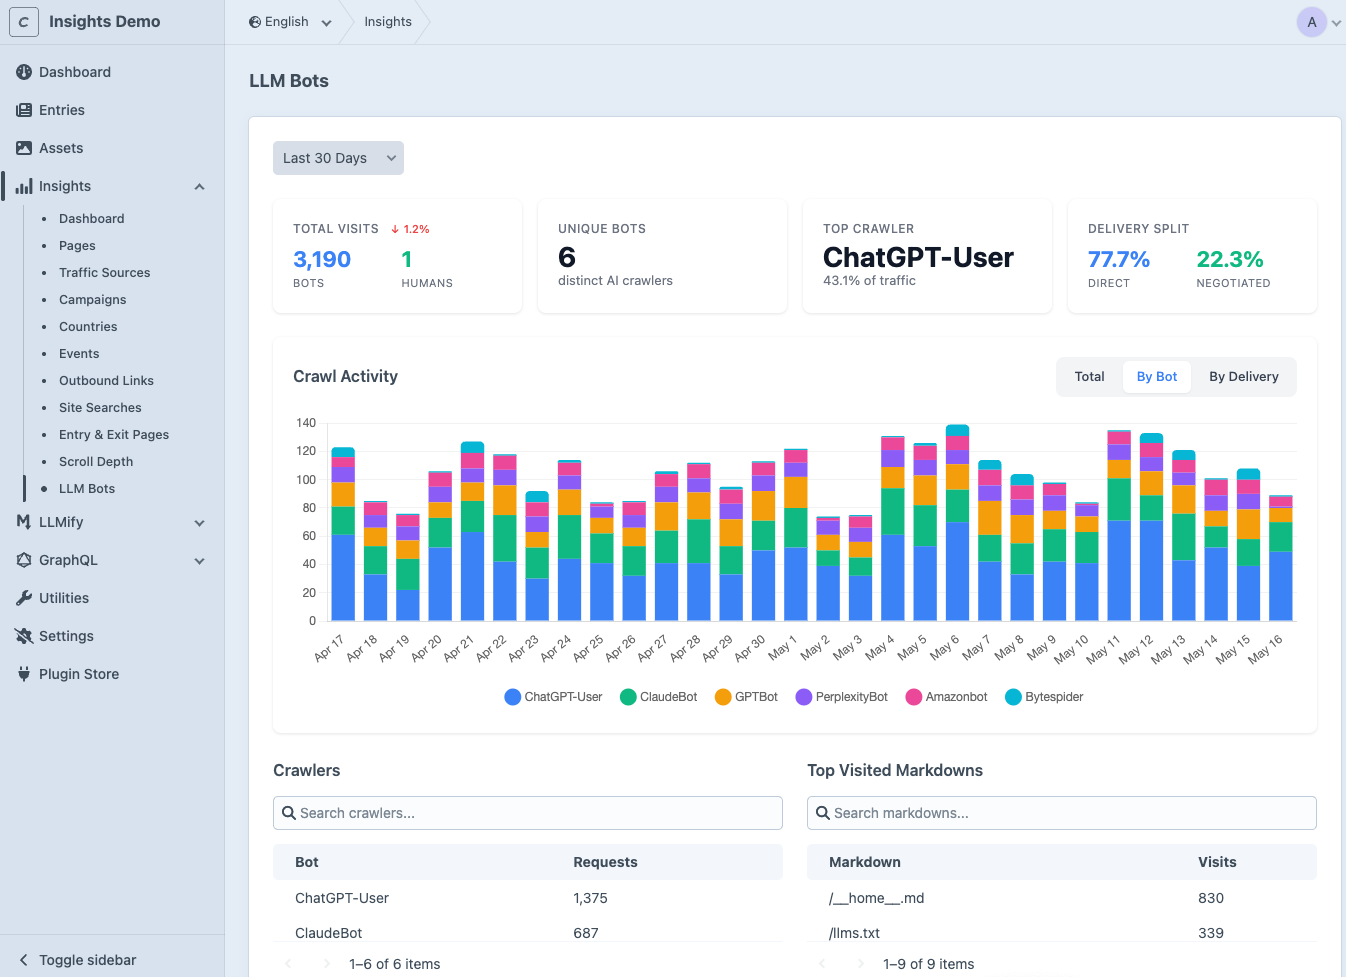
The integration activates automatically when both plugins are installed. See the AI Bot Analytics page for the full setup.
You're all set. Head over to the Basic Overview to learn about the Dashboard, Permissions, and other features.
Support
If you encounter bugs or have feature requests, please submit an issue. Your feedback helps improve the plugin!