Basic Overview
Here you can find a basic overview of all core parts of the LLMify plugin
Dashboard
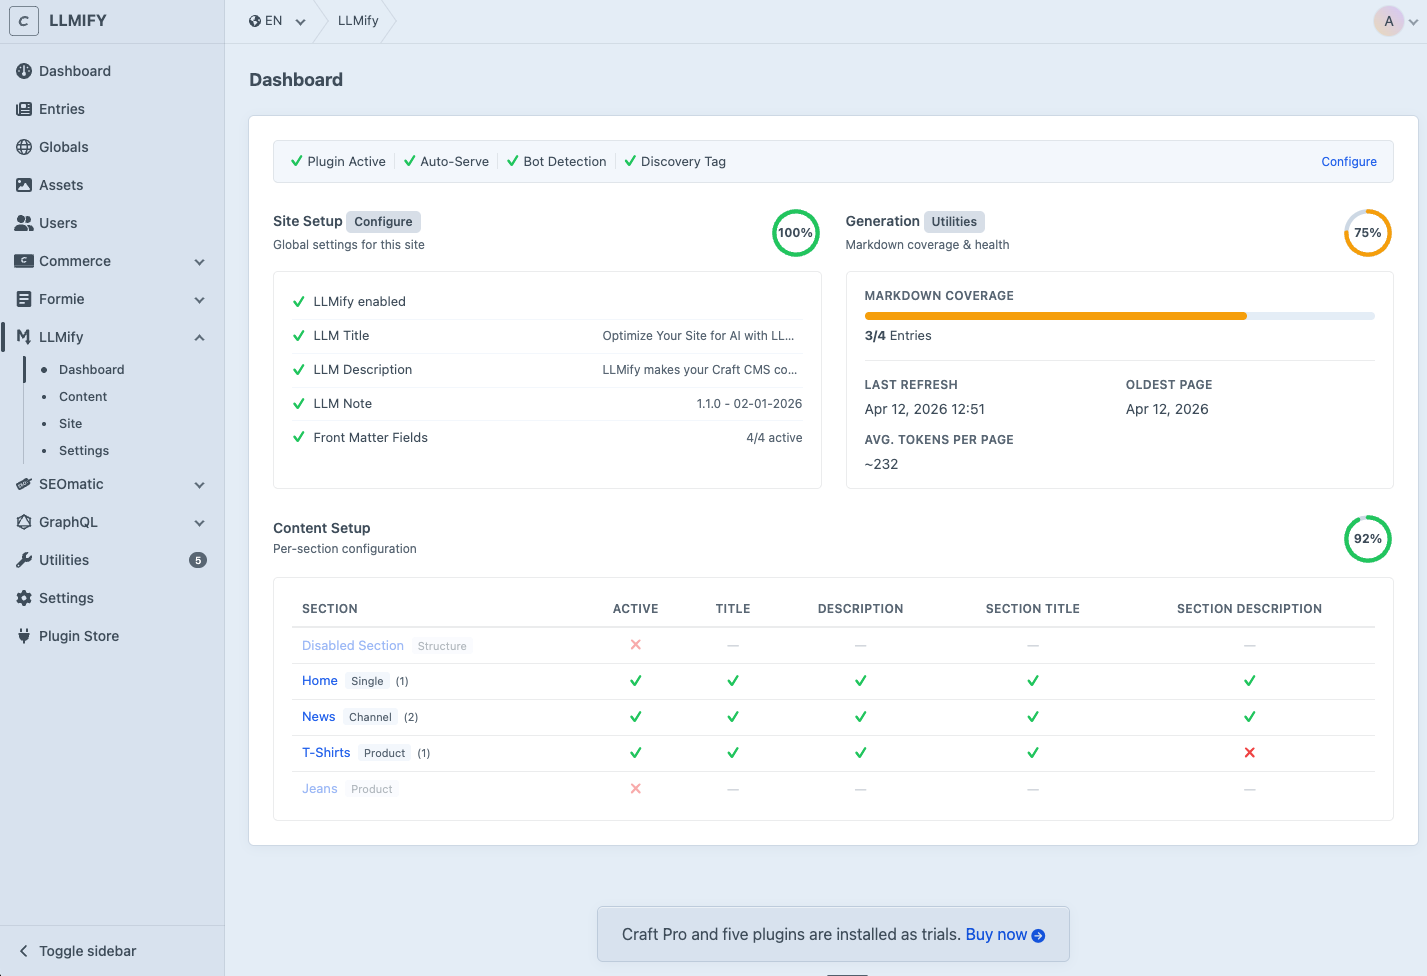
The Dashboard gives you an overview of your LLMify setup. It shows a setup score for the current site, how many pages are cached, the average tokens per page, the oldest cache entry and section-level content statistics.
Pages whose Markdown could not be rendered are listed under Failed Pages with the reason, e.g. a template error, no {% llmify %} blocks or empty Markdown. A page leaves the list as soon as it renders successfully.
Site Settings
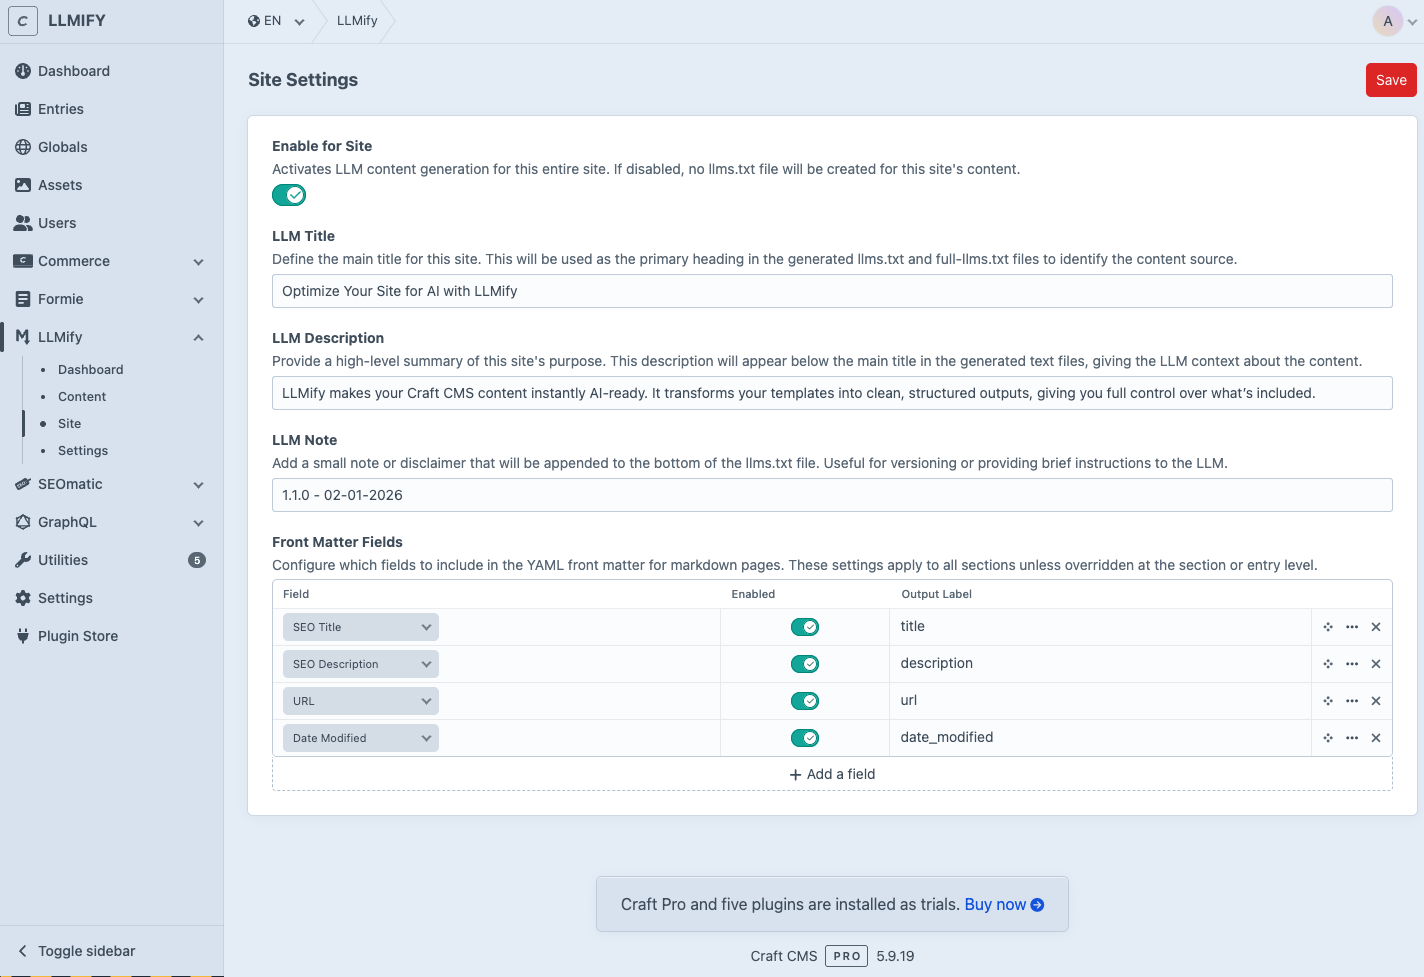
Site Settings is where you set default site-wide settings, on a per-site basis. This includes enabling or disabling LLMify for the site, setting the site title and description for llms.txt, and configuring default front matter fields that are inherited by all sections.
You can also turn llms.txt off per site. The Markdown pages stay available.
LLMify 1.x also served an llms-full.txt. It was removed in 2.0: it is not part of the llms.txt spec, large sites easily outgrow any context window with it, and AI crawlers don't even request it.
Enable Include Social Links to add a ## Social section with your social profiles to llms.txt. If SEOmatic is installed, the link table is prefilled with its "Same As URLs" and keeps following them until you save your own changes.
Content Settings
Content Settings is where you can set default content settings, on a per-section basis.
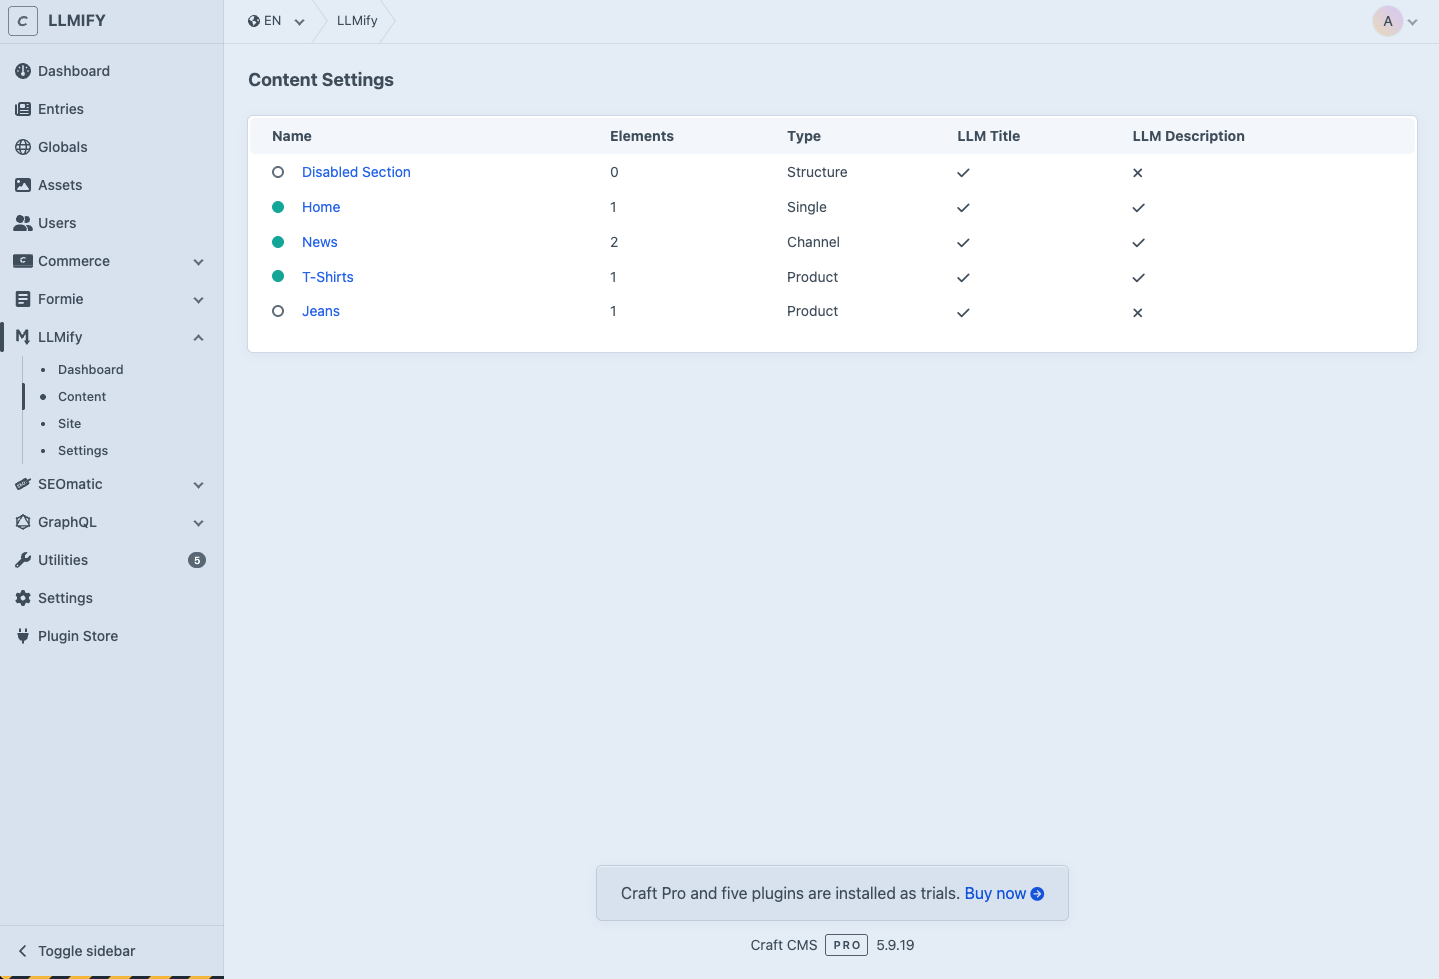
The list of these content types includes status indicators identifying what's been configured for each one.
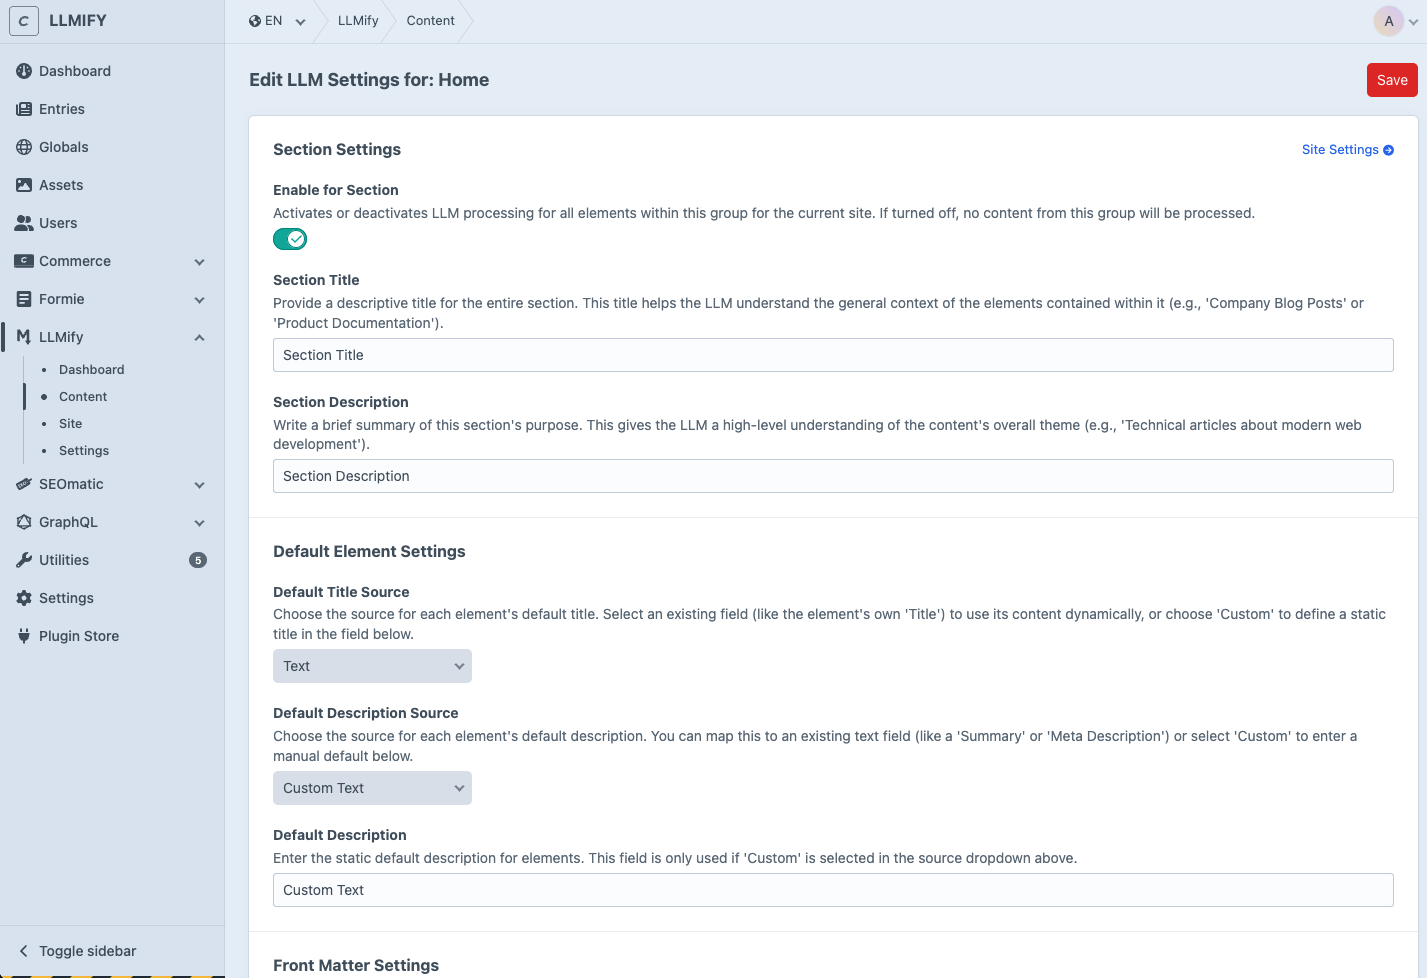
It is important to set LLM Title and Description for each content type, as they are used in the llms.txt file to provide context for the LLMs.
Content Settings also lets you override the site-level front matter fields for a specific section.
You can drag rows in the Content Settings list to control the order sections appear in llms.txt. The order is stored per site, so multi-site setups can use different orderings.
Entry Settings
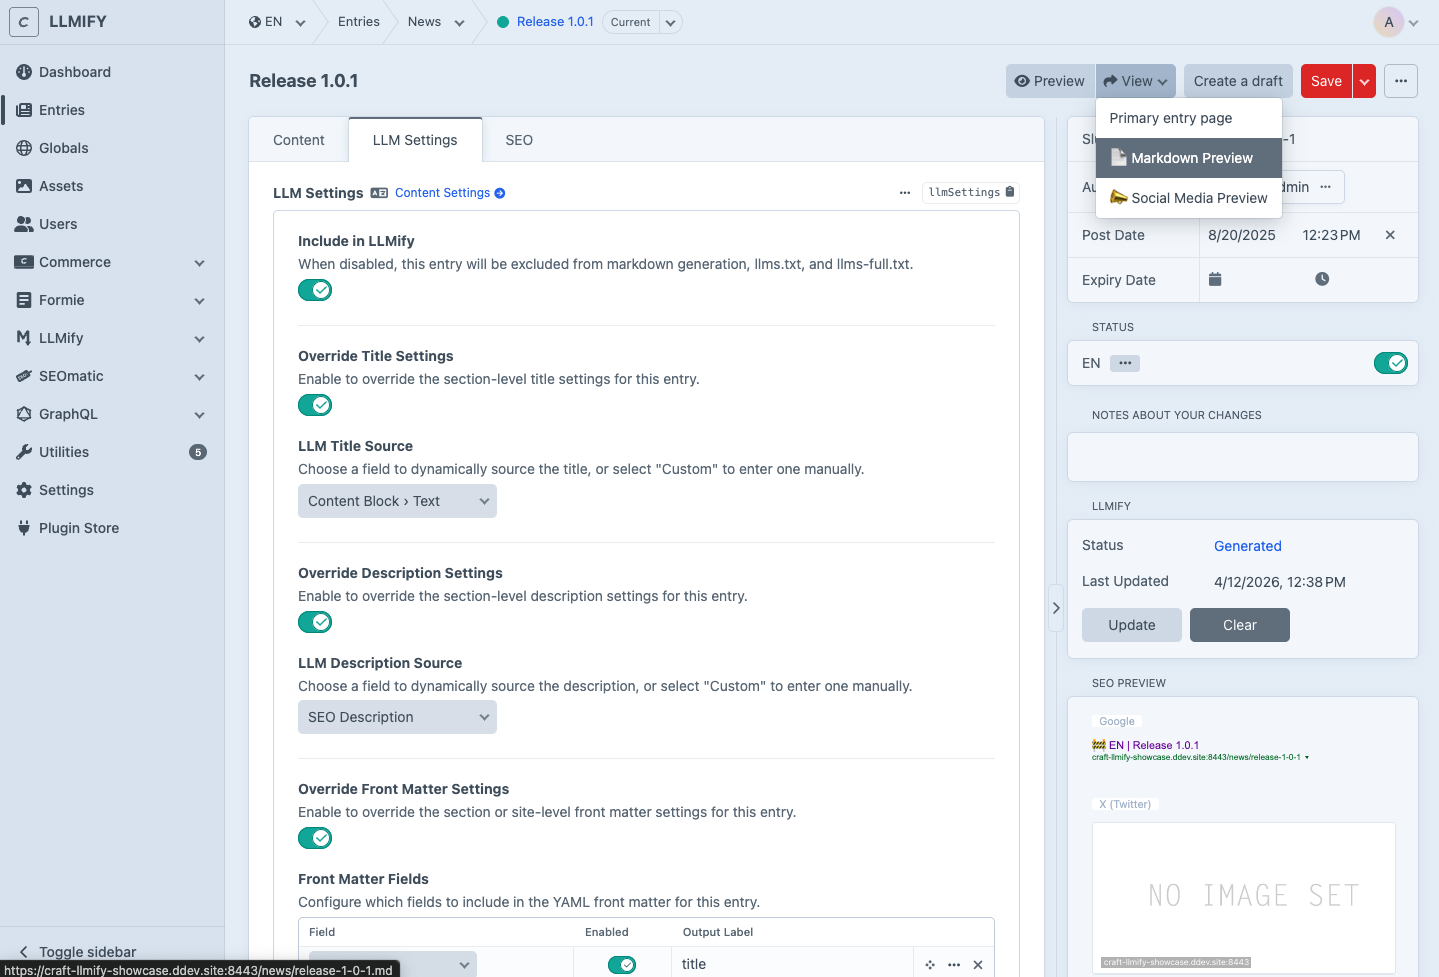
LLMify has an LLMify Settings Field that you can add to your Entry Types. You can use this field to override the content settings for each entry, including title source, description source, and front matter fields. You can also exclude individual entries from LLMify entirely.
Settings Inheritance
Settings follow a hierarchical inheritance model: Site > Section > Entry. Each level inherits from the one above and can optionally override specific values. For example, front matter fields defined at the site level are inherited by all sections, but a section can override them, and an individual entry can override the section settings.
Sidebar Panel
The sidebar panel on entry and product edit pages shows the current LLMify status for that element:
- Whether the Markdown is cached, since when and its size in tokens, with a link to the
.mdURL. - If the last attempt to render the Markdown failed, the date and the reason.
- If LLMify is disabled at the site, section, or entry level, which setting is responsible, with a direct link to the relevant settings page.
Refreshrenders the Markdown again,Clearremoves it from the cache.
Button visibility depends on user permissions. Users need the "Warm Markdown Cache" and "Clear Markdown Cache" permissions respectively.
Preview Targets
LLMify registers Markdown preview targets for entries and products. This allows content authors to preview the Markdown output directly from the entry editor using Craft's built-in preview system.
LLMify Utility
The LLMify Utility shows per site how many pages are cached and since when. You can access it in the Craft control panel under Utilities.
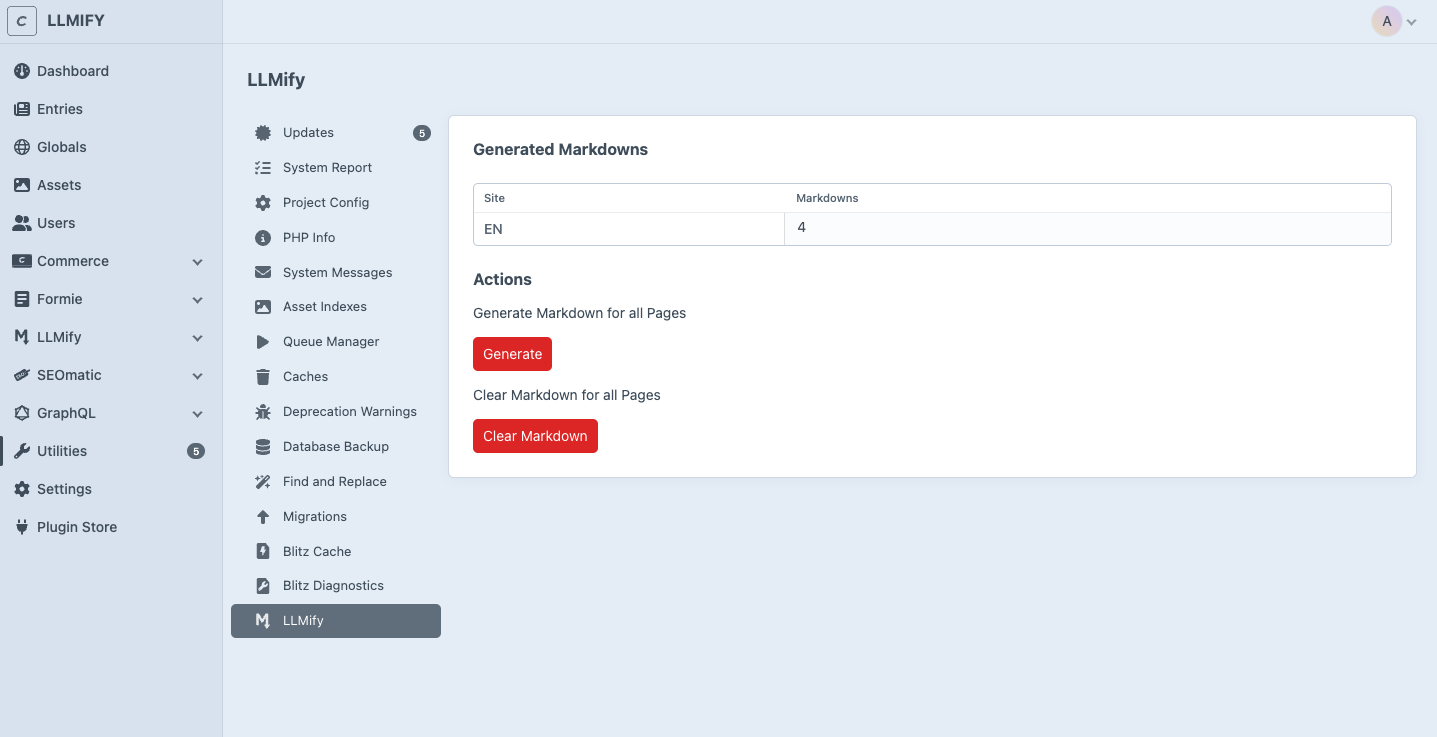
- Warm Cache caches every page that is enabled for LLMify and not cached yet. It runs as a queue job.
- Clear Cache removes all Markdown from the cache. Pages are rendered again on their next request.
The Markdown cache can also be cleared from Utilities > Clear Caches (the LLMify markdown option) or with php craft clear-caches/llmify.
How Caching Works
LLMify renders the Markdown of a page on its first request, from the same template Craft uses for the HTML page, and stores it in Craft's data cache. Every request after that is served from the cache.
While rendering, LLMify collects Craft's element cache tags, the same mechanism Craft uses for {% cache %} tags. The cached Markdown is therefore invalidated as soon as the page or anything it shows (related entries, assets, globals) changes, no matter where it is saved from. Saving the LLMify plugin, site or content settings clears all Markdown.
A few things follow from that:
- No queue and no outgoing requests are needed. Markdown is rendered inside the request that asks for it, so it also works on offline sites or behind HTTP Basic Auth.
- The first request of a page is slower, because it renders the page template. If you want every page to be fast from the start, e.g. after a deployment, warm the cache.
- The page is rendered as an anonymous visitor at its own URL, even if the request comes from a logged-in user. Content that depends on the current user never ends up in the cache.
- Previews are never cached.
cacheDurationlimits how long Markdown stays cached, for content that cache tags do not track.
If a page cannot be rendered, LLMify remembers the reason, shows it on the dashboard and in the sidebar, and does not advertise Markdown for that page in the discovery tag. Details are logged under the llmify category in Craft's logs.
LLMify 1.x worked differently: saving an entry added a queue job that requested the page from your own site and stored the Markdown in the llmify_pages database table. That table is dropped when updating to 2.0, and the Markdown is rendered again on the next request.
AI Bot Analytics
When Craft Insights is installed alongside LLMify, a dedicated dashboard for tracking AI crawlers appears in the Insights subnav. You see which bots hit your Markdown, how often, which pages they read most, and whether they arrive via direct Markdown URLs or content-negotiated responses.
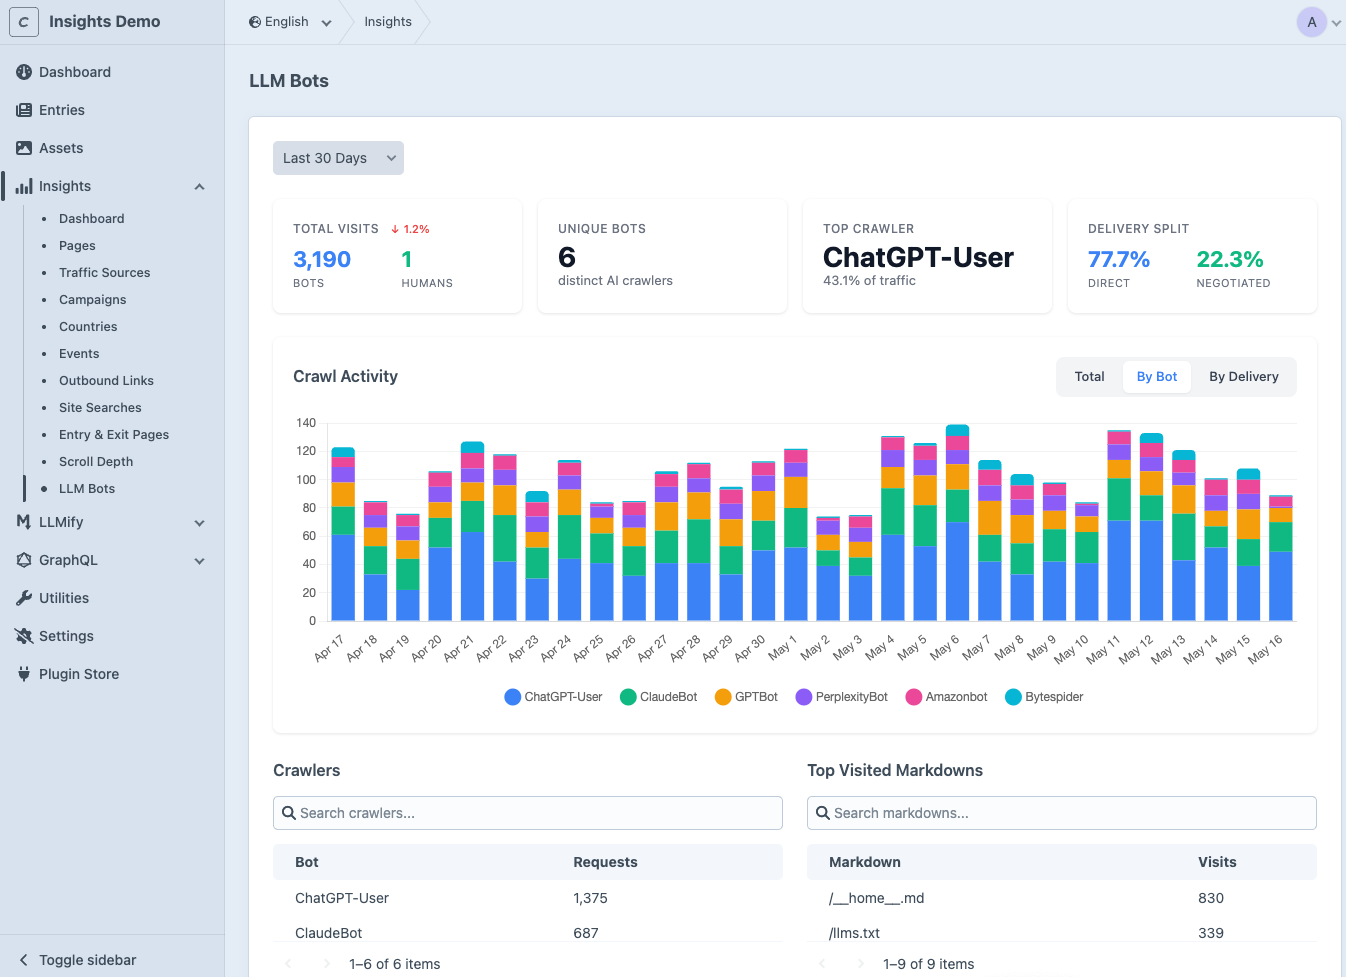
Setup details and KPI breakdowns are on the dedicated AI Bot Analytics page.
Permissions
LLMify provides granular user permissions (available with Craft Pro):
You can assign these permissions to user groups under Settings > Users > User Groups in the Craft control panel.